 |
|
|
|
| Loading and Use of a PHOTOSHOP Script Loading and Use of an Adobe ELEMENTS Script How to Use Pencil Pixels Scripts |
|
|
|
The image artwork in the following instructions were developed for our Moods Scripts.
Although named differently, the Scripts you purchased are loaded and used in the exact same way.
|

|
|
|
 Quick Start - Follow these instructions for loading and running a script in Photoshop. Quick Start - Follow these instructions for loading and running a script in Photoshop.
1- Have an image open in Photoshop.
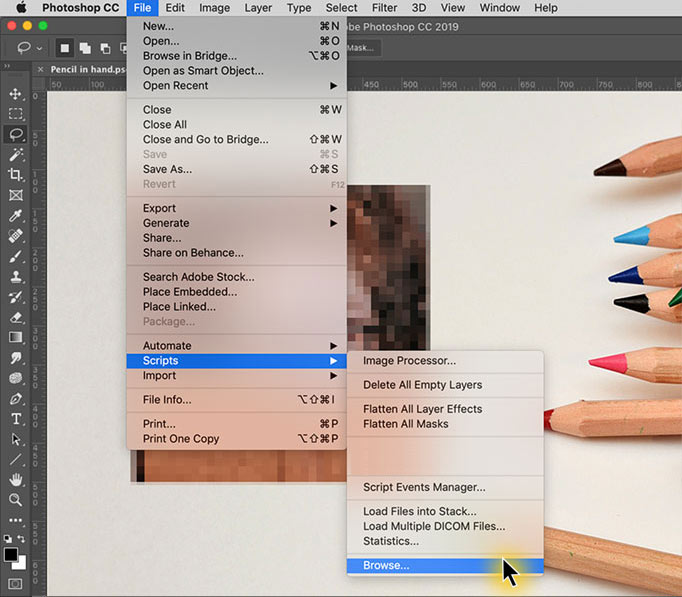
2- You select the script from the Photoshop Menu… FILE >> SCRIPTS >> BROWSE…
3- From the dialog box that opens, select the example_photoshop.jsx file from where it is located.
4- After a short time the effect will be produced on your image - Done!
|
Here is more detailed information for loading and using the
Pencil Pixels script effects with Photoshop.
 |
|
Pencil Pixels Scripts are easy to use.
The scripts are "lightweight", there is just 1 file.
Usually there are no additional brushes, backgrounds or styles to load in order to get great results with just one click.
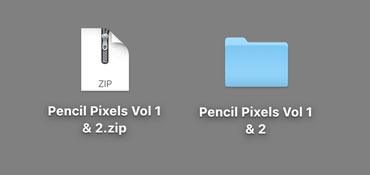
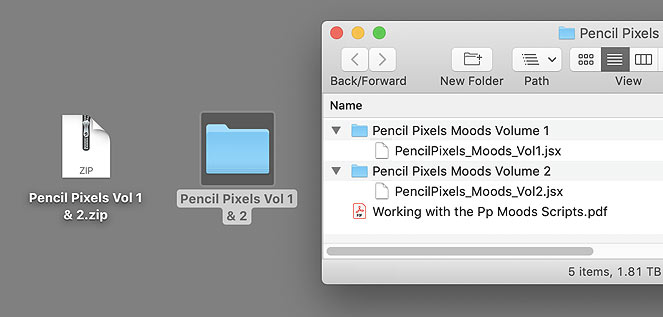
The file comes compressed as a zip file. Double click the file, if it doesn't automatically unzip to show the folder.
|
 |
|
A scripts folder will contain one or more scripts and instructions for loading or using the script.
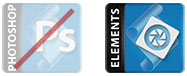
Some of Pencil Pixels scripts work with Photoshop, some only with Adobe Elements and some will work in both applications.
 This script is for using and loading This script is for using and loading
in Photoshop
|
Using a Photoshop script effect on an image
- A script does not use or manipulate your original image or layers. It duplicates your file first.
- Layers can additionally be manipulated if desired.
- Works exceptionally well with portraits, figure studies and composite artwork.
- Mac OS X or Windows compatible.
There are three ways to use a script and apply the effect to your image. Each works and it will depend on your workflow or how
familiar you are with Photoshop.
In all cases, first have an image open in Photoshop. Then use any of the following methods.
|
1) If you have placed this script or other scripts in a single folder somewhere,
you can select any of the script files from the Photoshop Menu…
FILE >> SCRIPTS >> BROWSE…
First go to the FILE menu.
Drag down to the SCRIPTS menu item.
Select BROWSE … from the pop out menu, as seen below
 |
|
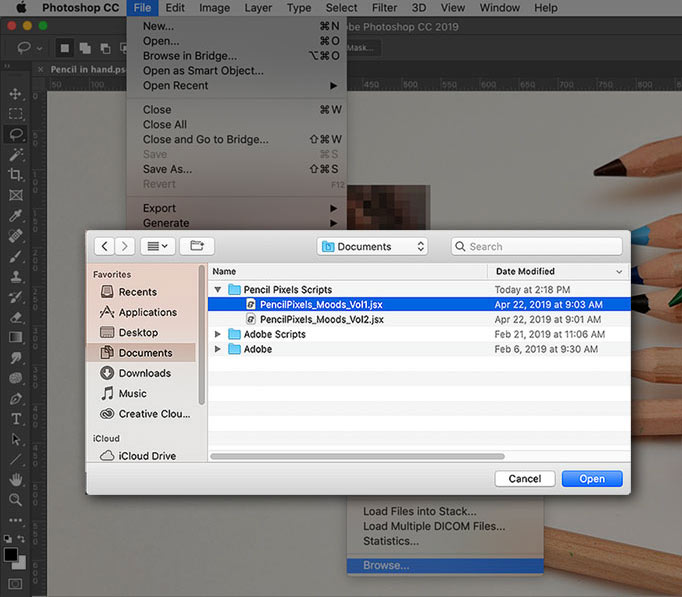
Next, a dialog window, pictured above, will pop up for you to locate and select the script file you want to use.
Locate the "PencilPixels_EXAMPLE_effect.jsx" file from the folder that you’ve stored it in.
Click OPEN and the script will begin.
|
or you can...
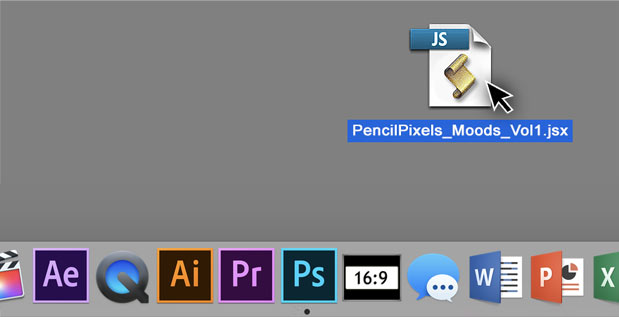
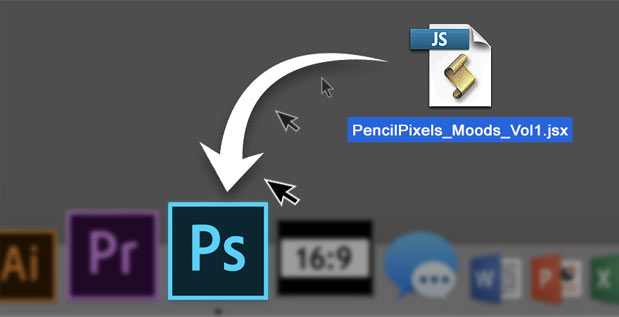
2) One of the easiest ways to load and use a script, is to just drag the Pencil Pixels script file
onto the Photoshop application Icon. The effect will begin to work on your image - and then you’re Done!
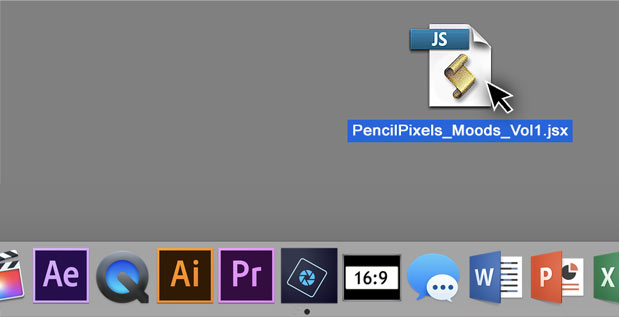
If the .JSX icon looks generic or doesn't look like the one below, no worries the file is the same.
|
 |
|
 |

|
|
or you can...
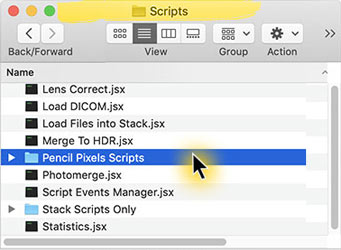
3) You place the Pencil Pixels scripts into the SCRIPTS folder of your Photoshop application.
You only have to do this once, but with this method, you can select the Pencil Pixels scripts directly from the Photoshop Scripts Menu.
File >> Scripts >>
First go to the FILE menu.
Drag down to the SCRIPTS menu item.
The Pp script can be selected from the scripts pop-out window.
The name of Pencil Pixels Scripts will begin with "Pp" to distinguish
it from Photoshops' default scripts.
|
|
In order to use this method, you first need to put the Pencil Pixels script files into a specific location.
Again, you only need to do this once and it will always be available directly from
the Photoshop scripts menu.
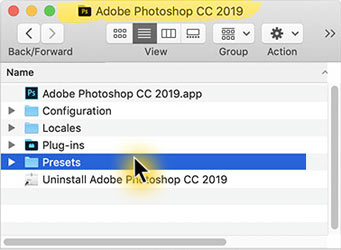
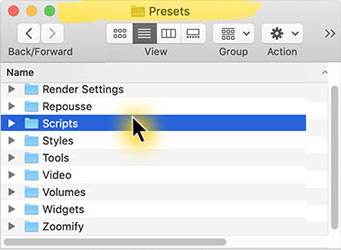
For Photoshop on the Mac OS X operating system, it goes in the folder with the path:
/Applications/Adobe Photoshop [VERSION]/Presets/Scripts/
On the Windows operating system it goes in the folder with the path:
C:/Program Files/Adobe/Adobe Photoshop [VERSION]/Presets/Scripts/
For your ease of selection, any Pencil Pixels scripts you have should be placed in a single folder, in the scripts folder.
   |
|
|
|
Restart Photoshop.
Once you've placed the scripts in the scripts folder,
restart in order for the scripts to appear in the Scripts menu.
With this method, you can select the Pencil Pixels scripts directly from the Photoshop Scripts Menu.
File >> Scripts >>
where the name of the Pp script can be selected.
Again, The name of Pencil Pixels Scripts will begin with "Pp" to distinguish it from other default scripts.
|
|
|
|
|
|
|
|
|

Follow these instructions for loading and running a script in Elements.
As easy to use as actions!
The images in the following instructions were developed for our Moods Scripts.
However, the Scripts you purchased are loaded and used in the exact same way.
|
|
|
 |
|
Quick Start
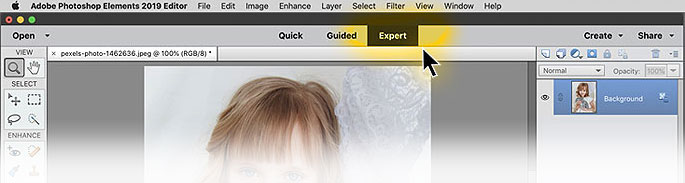
1- Make Sure that Elements is in Expert Mode.
2- Open an image in Elements.
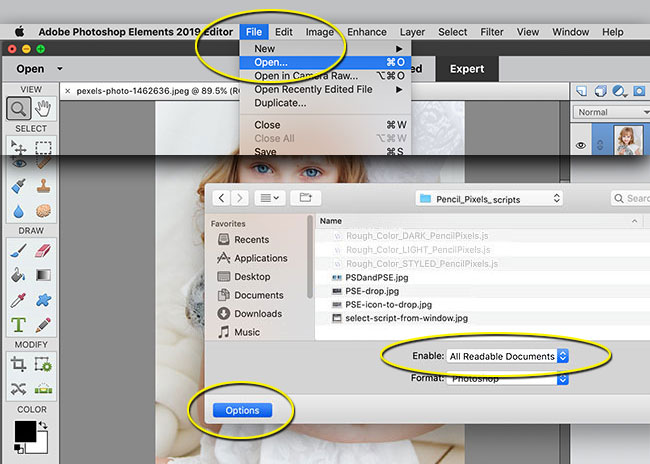
3- You select the script file from the Elements Menu
FILE >> OPEN...
If the script name is grayed out - in the dialog window that opens, click the options button in the lower left. A drop down selection button will be displayed – here you select
'All Documents'.
This will now show all files, including Script files.
4- Select the example_elements.jsx script file from where
you have stored it.
5- The effect will be produced on your image - and Done! |
Here is more detailed information for loading and using the Pencil Pixels script effects
|
|
Pencil Pixels Scripts are easy to use as actions.
The scripts are "lightweight", there is just 1 file.
Usually there are no additional brushes, backgrounds or styles to load in order to get great results with just one click.
The file comes compressed as a zip file. Double click the file, if it doesn't automatically unzip to show the folder.
|
|
|
A scripts folder will contain one or more scripts and instructions for loading or using the script.
Some of our other scripts work with Photoshop, some only with Adobe Elements and some will work in both applications.
 This script is for using and loading This script is for using and loading
in Elements
|
Using an Elements script effect on an image
- A script does not use or manipulate your original image or layers. It duplicates your file first.
- Layers can additionally be manipulated if desired.
- Works exceptionally well with portraits, figure studies and composite artwork.
- Mac OS X or Windows compatible.
|
 |
|
There are four ways to use a script in Elements and apply the effect to your image. Each works and it depends on your workflow or how familiar you are with Elements.
In all cases, first have an image open in Elements and make sure that you are in Expert mode.
Then use any of the following (4) methods.
|
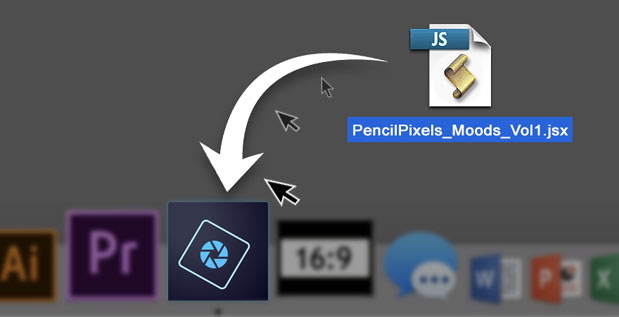
1)
The easiest ways to load and use a script, (on newer versions of Elements testing version 14+),
when Elements is running and an image is open, simply drag the Pencil Pixels script file onto the Elements Application Icon.
|
 |
|
 |
 |
|
Or you can...
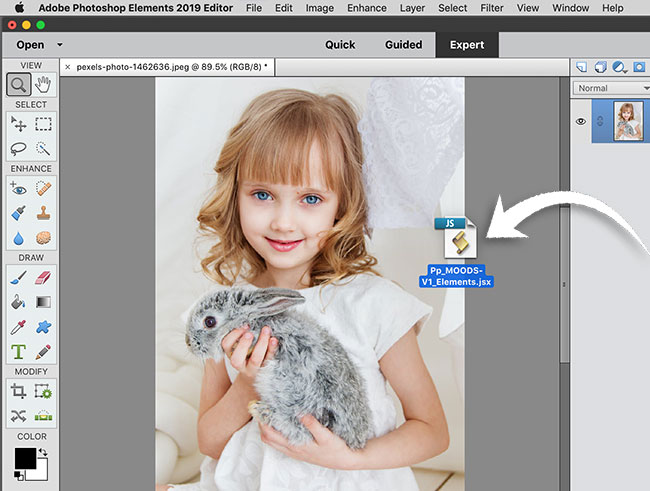
2)
On the newer versions of Elements,
you can drag the script file onto your open image in Elements.
This is the simplest and easiest way to use a Pencil Pixels Script effect. |
|
|
Or you can...
3)
Select a script file from the Elements Menu in the following way…
From the Elements Menu, select FILE >> OPEN
In order to see all the files available on your computer as well as Script files,
Select the 'Options' button in the lower left of the panel.
The 'Options' button will show a dropdown selection to 'Enable:'
different document types.
|
 |
|
Select 'All Documents'
|
 |
|
Then select the Pp script from the folder you've stored it in.
|
 |
|
Or you can ...
The Pencil Pixels scripts are configured so that they can be used with the following method…
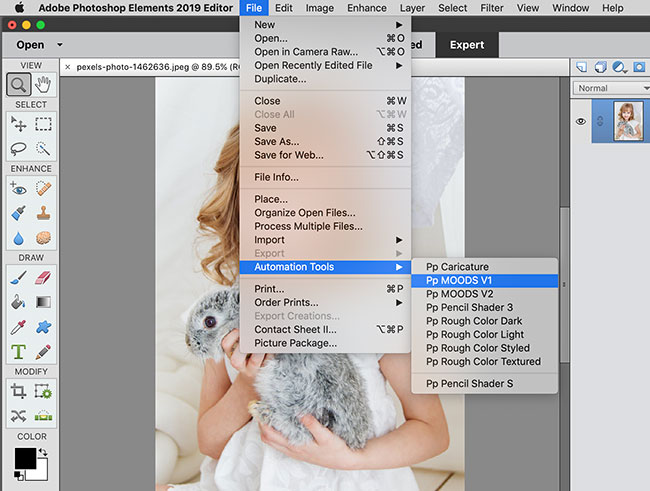
4) You can place the Pencil Pixels scripts into the SCRIPTS folder of the Elements application.
Once placed there with this method, you can select the scripts directly from the Automation Tools Menu.
File >> Automation Tools >>
Go to the FILE menu.
Drag down to the Automation Tools menu item.
The name of the script can be selected from the pop-out selection.
The name of Pencil Pixels Scripts will begin with "Pp" to distinguish it from the other default scripts.
|
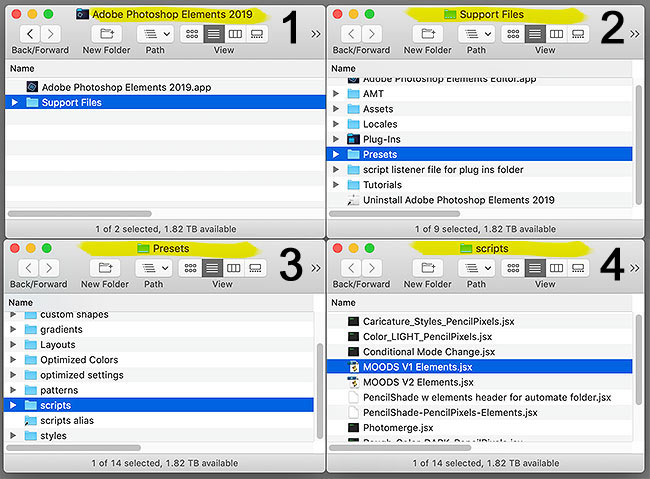
In order to function this way, you first need to put your script files into a specific location.
But you only need to do this once and it will always be available directly from the Automation Tools menu.
On the Mac OS X operating system, it goes in the folder with the path:
/Applications/Adobe Photoshop Elements [VERSION]/Support Files/Presets/Scripts/
On the Windows operating system it goes in the folder with the path:
C:/Program Files/Adobe Photoshop Elements [VERSION]/Support Files/Presets/Scripts/
Restart Elements.
Once you've placed the Pp scripts in the scripts folder,
restart in order for the scripts to appear in the
Automation Tools menu.
With this method, you can select the Pencil Pixels scripts directly from the Menu.
Again, The name of our scripts will begin with "Pp" to distinguish it from the other default scripts.
|
 |
|
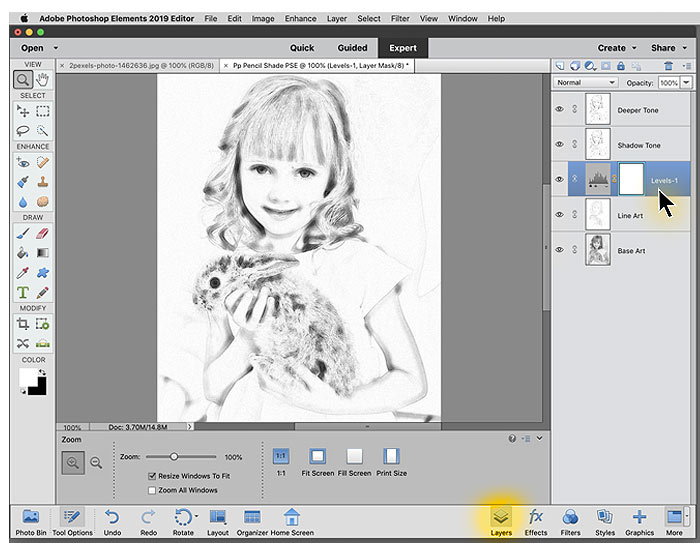
Side Note:
In working with the Pencil Pixels Scripts, you can experiment with the layers that make up the effect by turning some on or off, by changing the opacities and the blend modes of these layers.
To show the Layers palette in Elements, select the Layers icon at the bottom right of the Application screen. |
  |
 |
Script compatibility notes
- Compatible with Mac OS X and Windows versions of Photoshop
- Versions of this product may be available for Photoshop, Adobe Elements or both. Please order the product, if available, for your App.
- Adobe is updating and advancing Photoshop more rapidly than ever. For our scripts in Photoshop, it will be indicated in our advertised information for the version of Photoshops' compatibility.
Older available scripts are tested to work with versions CS 5.5 through Creative Cloud versions 2019.
More recent scripts are compatible from versions 2019 through current Creative Cloud versions.
- In Photoshop Elements, scripts are tested to work with version 2014 to version 2019 (last tested on)
- Works exceptionally well with portraits, figure studies, and composite artwork
- Best for online sized use when the image is less that 2400 pixels and newer scripts to 4000 pixels. Please use and view at 100% to see optimum results. Developed for best use with online Ads, Social Media and Web Pages.
|
|
How do you apply any of multiple effects scripts?
Note: When the Pencil Pixels script is processing an image, please let the process complete before clicking on the image or the tool bar.
If the script creates just one effect, it will automatically start the effect when you load the script.
|
|
 |
|
The images in this instructional are from Photoshop. If a Pencil Pixels Script is available for Elements, it will work the exact same way.
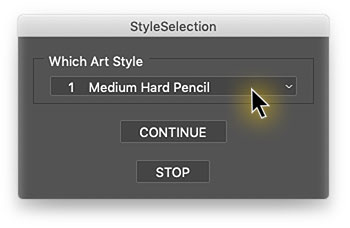
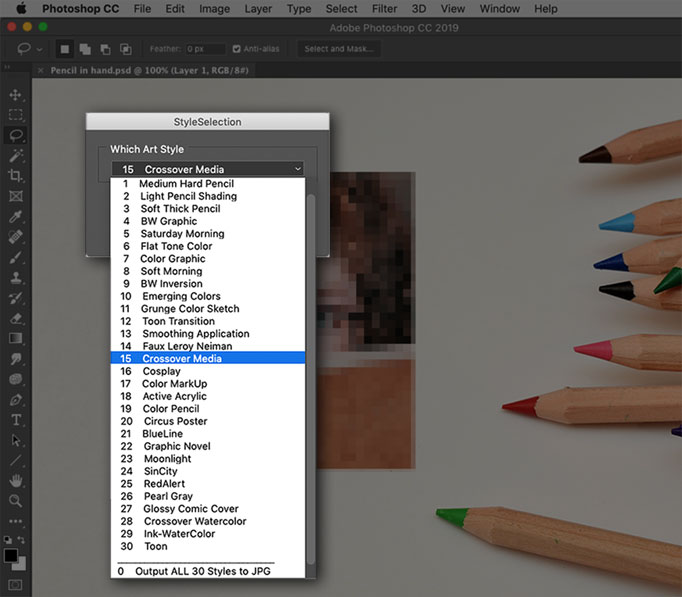
If your script comes with multiple effects to choose from, After you "load" the script in any of the ways mentioned above, a dropdown menu box will appear for you to select any of the effects to use.
Click on the top button to show the dropdown menu.
You will first see a "Style Selection" menu for you to choose an effect from. Click the CONTINUE button to proceed.
|
 |
|
In the example here of our MOODS script, the menu shows the 30 effects that you can choose from.
|
  |
|
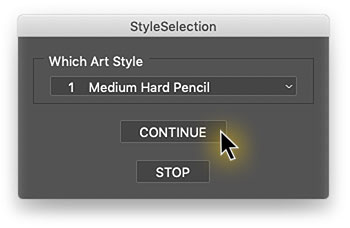
After an effect is selected, click the 'CONTINUE' button to start the effect, or just select a different effect from the dropdown.
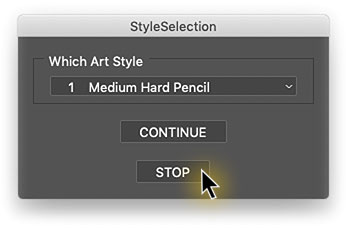
Note: you can select 'STOP' to halt the script with out processing the image.
|
 |
|
Which effect to use?
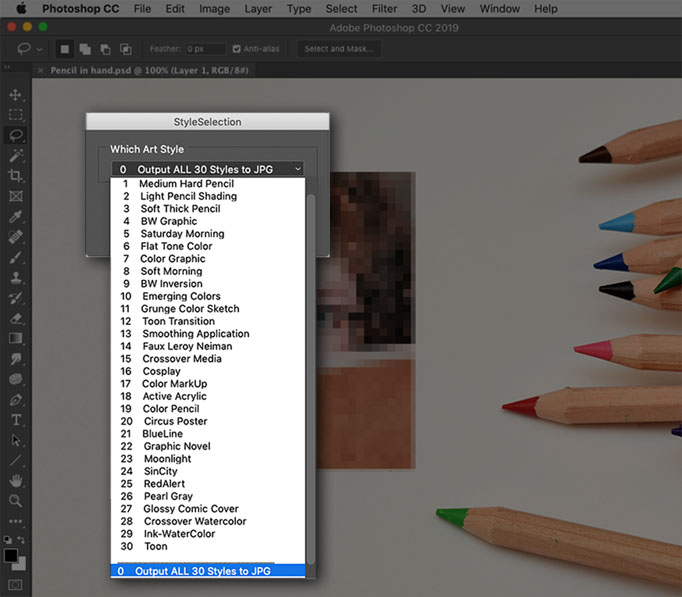
In a multiple effect script, there maybe an 'Output All' option at the bottom of the list.
"Output all effects to JPG". You may have to scroll down to see it at the bottom.
You can select this option to have all the effects output and saved as JPG images. The program will allow you to select an existing folder or create a new folder to save the JPGs in. It will make each of the included effects on your image. This process may take a minute or two depending on the speed of your computer.
It makes the styles to the size of the image that was open in the application. You may want to use a low-res size file at first, to see all the effects applied to your image.
When completed, you can view which effect is best for that image - Go back to the original image and select the name or number of the effect for the layered Photoshop/Elements file.
The layers are available so you can tweak the look of the effect by turning the layers on or off, adjust the opacity strength of the layers or change the blend modes of the layers. This will subtly, or dramatically alter the appearance of the effect.
Experiment, this is a good thing to do!
|
Layer Dynamics
Like all our other scripts, you can create variations of the effects by turning on or off some of the layers that effect the images density, color, effect layers and more.
Each of the image effects usually include layers to adjust contrast, density, texture, color, as well as the multiple layers that make up the effect. The effects are made to work on average lightness and contrast images.
By first adjusting the images’ tone to have more or less brightness and contrast, you can alter the effect in different ways.
You can adjust the opacity of the layers to increase or decrease the effect of the resulting image. Layers are usually developed to allow you to alter the Color, Texture, Density, Line Tone, shadow textures, etc. Adjusting any of the layers, for opacity, visibility or blend mode, changes the appearance of the effect and allow you to customize the result.
|
|
Support
If you encounter a problem, and the above is causing an error please do the following;
Please contact Pencil Pixels and let us know;
-which of our software products you are using
-what operating system you are running
-and what version of the App you are using.
-If an error should occur, do a full screenshot of the alert message and also include the Photoshop History and Layers panel at the time of the error. This will help us research the cause and solve the issue quicker. We are always here to help and will get you up and running.
Feedback is always welcome let us know if you encounter any problems in running the scripts. If you have any questions about using our software, their compatibility, or terms of use, please contact us through our website.
|
|
|
Have Questions? Want more information? email us HERE
Pencil Pixels' Photoshop and Elements Scripting Effects PencilPixels.com
|
|
 |
Pencil Pixels(© 2007)
Pencil Pixels One-Click Scripts, Styles, Actions and Dragon Drops Download Agreement and Terms of use: Distribution, resale, reverse engineering, layer emulation or derivative development from the copyrighted products of Pencil Pixels is strictly forbidden by law. By downloading and/or using the One-Click Scripts, Actions, Dragon Drops or Styles of PencilPixels, you are accepting, and are bound by the terms of use of these products, and understand that they are the intellectual property of Pencil Pixels. This notice must remain with the Script. Effect Scripts, Styles, Actions and Dragon Drops developed by Pencil Pixels. Reach us at www.PencilPixels.com
http://translate.google.com
Please read the following information. If needed, use Google Translate to change this text to your language.
Por favor, lea la siguiente información. Si es necesario, usar Google Translate para cambiar este texto a su lengua!
Bitte lesen Sie die folgenden Informationen. Falls erforderlich, verwenden Sie Google Translate, um diesen Text, um Ihre Sprache zu ändern!
Si prega di leggere le seguenti informazioni. Se necessario, utilizzare Google Translate per modificare questo testo per la vostra lingua!
S'il vous plaît lire les informations suivantes. Si nécessaire, utiliser Google Translate pour modifier ce texte dans votre langue!
|